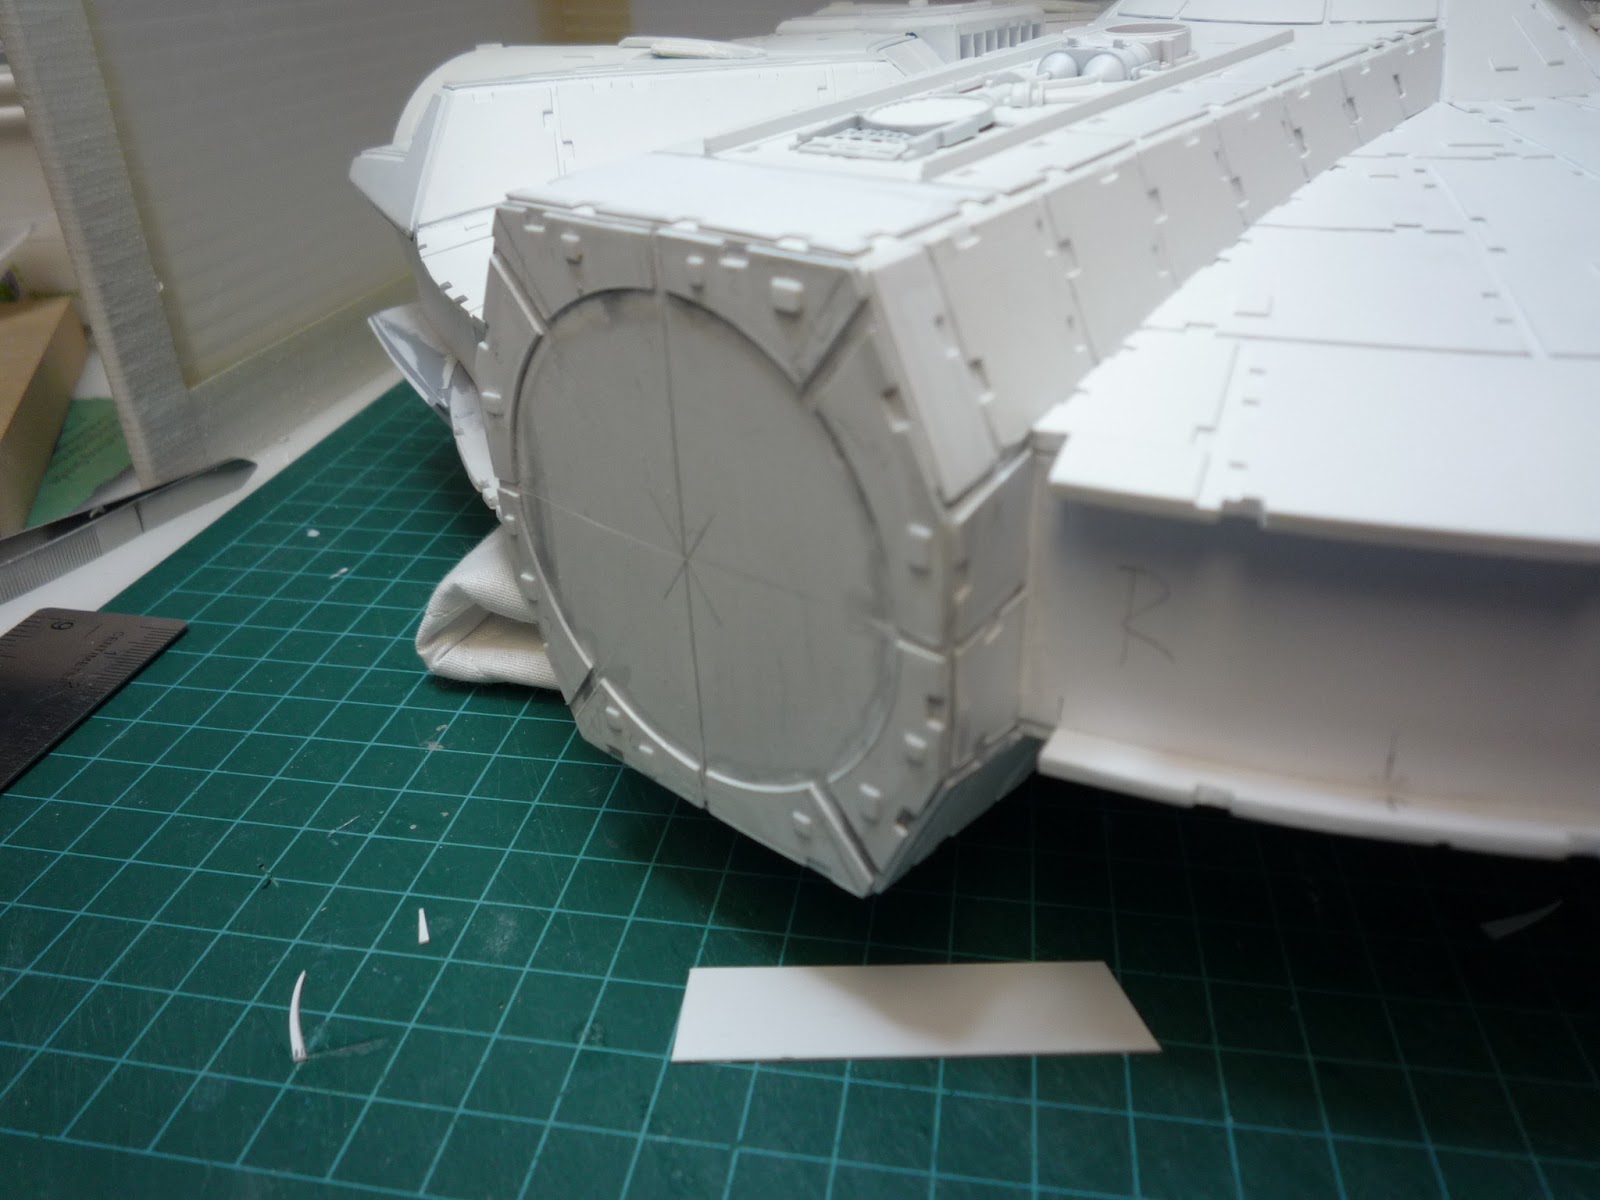
A little while ago I glued the upper and lower hulls together. Now I can proceed with the side details.
The docking rings were one of the first things I made so they've been sitting around for a while. First off was finishing the two side corridors.
This meant adding pieces to the sides and adding ledger strips and some center supports for the end piece.
 The ends were capped off.
Armor plates were cut to fit the end cap and around the docking rings.
The ends were capped off.
Armor plates were cut to fit the end cap and around the docking rings.
The plates were glued in place and some patches were added.
The docking rings were glued in place and corner brackets were installed.
Greebles were added by gluing parts from my stock onto a strip of .75mm styrene. Then gluing that into place. I've built up a stock of cast parts and added them in with a few individual parts from model tanks, planes and ships.
And just a couple pictures showing the top and bottom views.
I recently bought a couple model Flak gun kits to scrounge for parts. A 1/48 scale and 1/35 scale German 88mm GunFlak 36/37. I selected the parts I wanted and modified them so I could mold them with a one piece block mold. This meant back filling any gaps, holes and bridges, anything that would allow the molding rubber to get into or behind. Parts were then glued to a piece of .5 mm styrene and enclosed on each side with my LEGO blocks. The advantage of doing this is of course unlimited greeblies. I can now add as many as I want without worrying about running out.
Selected parts.
Set up ready for molding. I used OOMOO 30 for this mold.
Over night in the pressure pot and great results. I also cut the back off a tank model and molded it as well. I'll place it under the YT-1000 between the engines.
I used Smooth Cast 305, it has a longer pot life and requires 30 minutes to set, allowing more time to pour and for bubbles to be crushed in the pressure pot.
I just dribble the Smooth Cast into each cavity and seal up the pressure pot. Even though the casting material sets up in 30 minutes, I recommend you leave it in the mold overnight. The cast may be set up, but I find it's still a bit soft and can easily be deformed by handling it.
IMPORTANT NOTE: When molding and casting this type of mold, it is very important that the molds are laid out perfectly level inside your pressure pot or on your work bench. If not you will end up with a wedge shaped mold as the rubber sets up. Then when you set your mold up to cast, the casting material will flow to one side and you will not be happy with the results.
The cast parts are perfect and bubble free. All I have to do is cut away the overspill and sand the back side of each part.
Perfect copies.
I'm
really impressed with how this part came out. As you can see it's only
34mm long and you can see that all the details of the part are cast with no bubbles.
Now that the primary shape of the YT-1000 is coming together I thought I'd focus on some details. Many thanks go out to my friend Gavin for providing me with many greebles. Gavin has been a prolific model builder since he was a boy, you can visit his blog here, http://primaryhobby.blogspot.ca/.
Gavin gave me his collection of left over parts to use for my build.
I bought several of these compartmentalized storage boxes from the thrift store and spent many hours sorting all the parts.
The first item I built was a docking ring.
The docking ring went through a few changes until I was happy with it. The tube was formed on my lathe and the rest is styrene and greebles. Once I was satisfied I made a mold using Smooth on Mold-Max 15T then cast in Smooth Cast 300.
They turned out quite well and look good with a light coat of primer.
The front of the ship is not shown on my drawing so I have to make it up. I know that the cockpit rests in a cut out so I started with that.
Placing the cockpit and access tunnel in place temporarily.
I made the mandibles earlier and now I can fit them into place. They're much shorter that the Falcons.
A groove was cut through the center line of the mandibles and details added. Armor plates were also cut and glued into place.
Two mandibles.
The beginnings of the hull armor.
I'm trying to have the greebles look like they have a function. By connecting them together with conduit or pipes, or by having them touching, they look more realistic then just having a bunch of parts placed randomly.
The top and bottom turret windows were made of styrene, a turned disk and a slice of a PVC pipe. Inside you can see the beginnings of the laser turret and access tube. On the wall is a graphic I made using images of the Falcons turret as reference for drawing them on the computer.
Once I shrunk them down to the correct size, I printed them on label paper. I'll only be building the dorsal turret but there will be laser cannons on upper and lower sides.
Transferring the panel lines to the model. A compass and ruler is used.
A finished section of armor plates. I'll add small patches and greebles later.
That's all for now.