So onto the engines, after some careful measuring and looking at reference images I went with a piece of 1.25 inch PVC pipe.
PVC pipe marked out and holes drilled to hold the Epoxy putty.
An inner sleeve was added to keep the putty from leaking into the pipe.
I used Fix-it-Stick as it sets fast and rock hard.
Into the lathe to remove the excess putty and begin shaping.
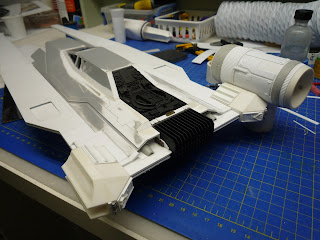
A layer of .5mm styrene was glued (using spray adhesive) to the exposed PVC part. This was done so I had something to glue the detail parts too. PVC and Styrene are not compatible with the solvent glue I use (methylene chloride). The black intake part is a found item, not sure what it was but I like it.
I'm using what ever reference I can find online and in books but I find they are not consistent. Probably because the talented artists that are making these images are also finding limited reference for every little detail. So I'm using what details I like and making some up. I'm not a purist when it comes to these things and it gives me a chance to put my personal stamp on my models.
The engine I built earlier is temporarily held in place on the 3D printed mount. I've added greebles to it as well.


