YT-1000 part 10, The Cockpit
Hello, it's been a while since my last update, like I said a while back, summer is not a busy time for modeling. But I have been working on some things. One item being the cockpit. I did do some work on this before, building various parts and now I'll show you how they all come together.
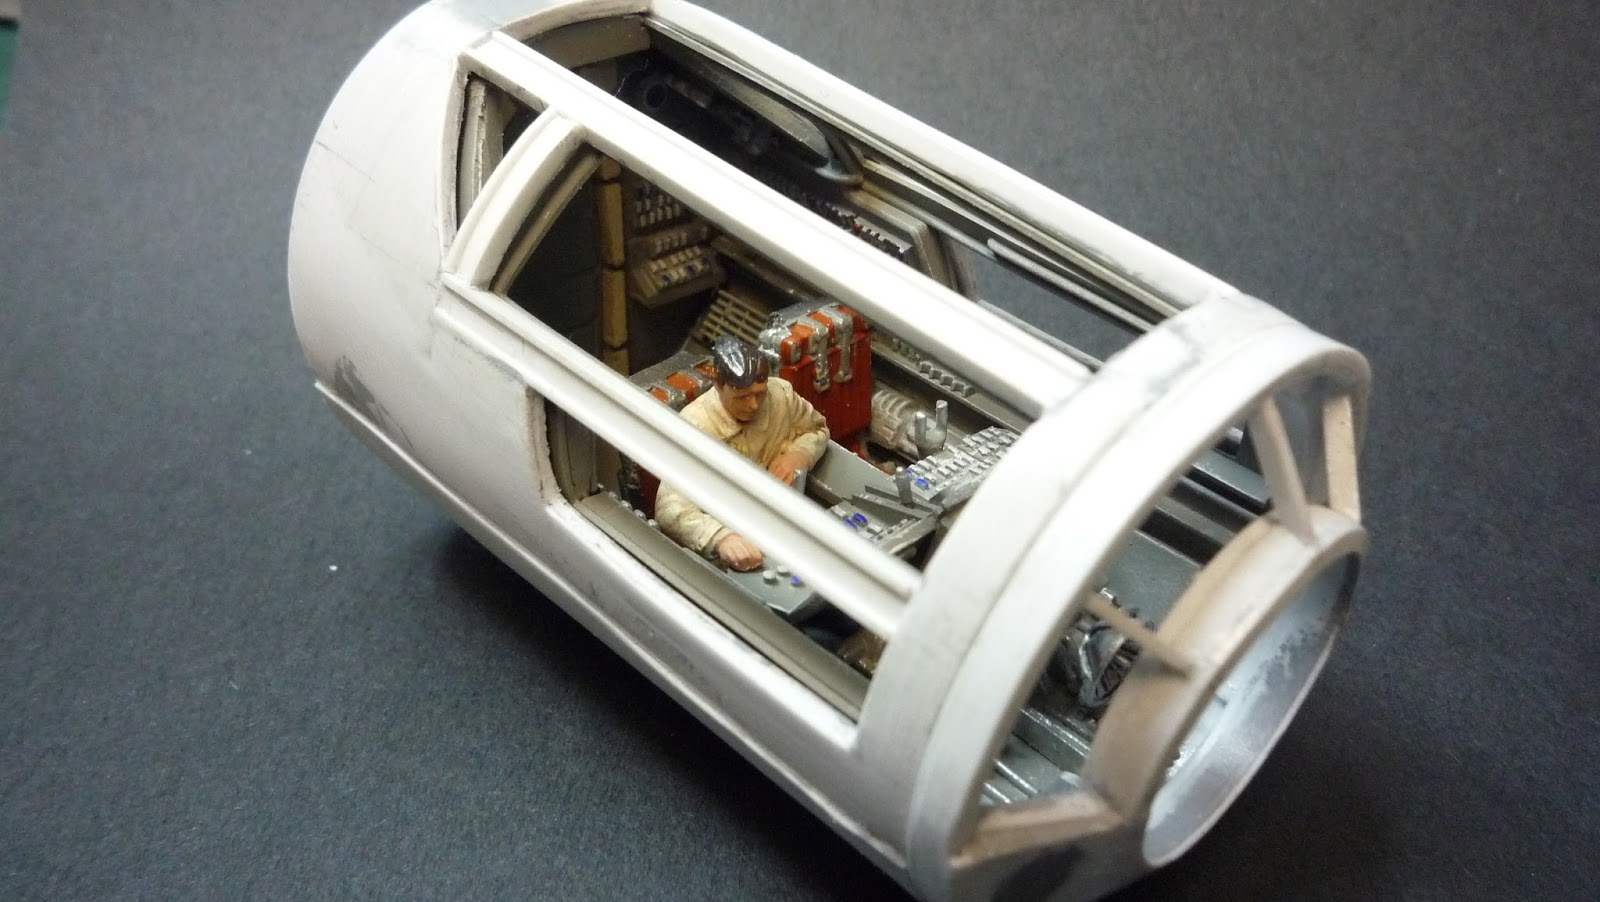
I started out by detailing the interior walls, I had built this part as a kind of tube which would slide into the cockpit frame, but I was worried about how I would hide the inside of the frame work as it would be visible. So I built the interior window frames to match the exterior frames, and added some details. Some styrene rods, and a few greebles.
I hate blown up images of my work as I get to see crooked things, but I'm the kind of guy who will start over if something is out by half a millimeter.
Everything looks pretty good though once it gets some paint.
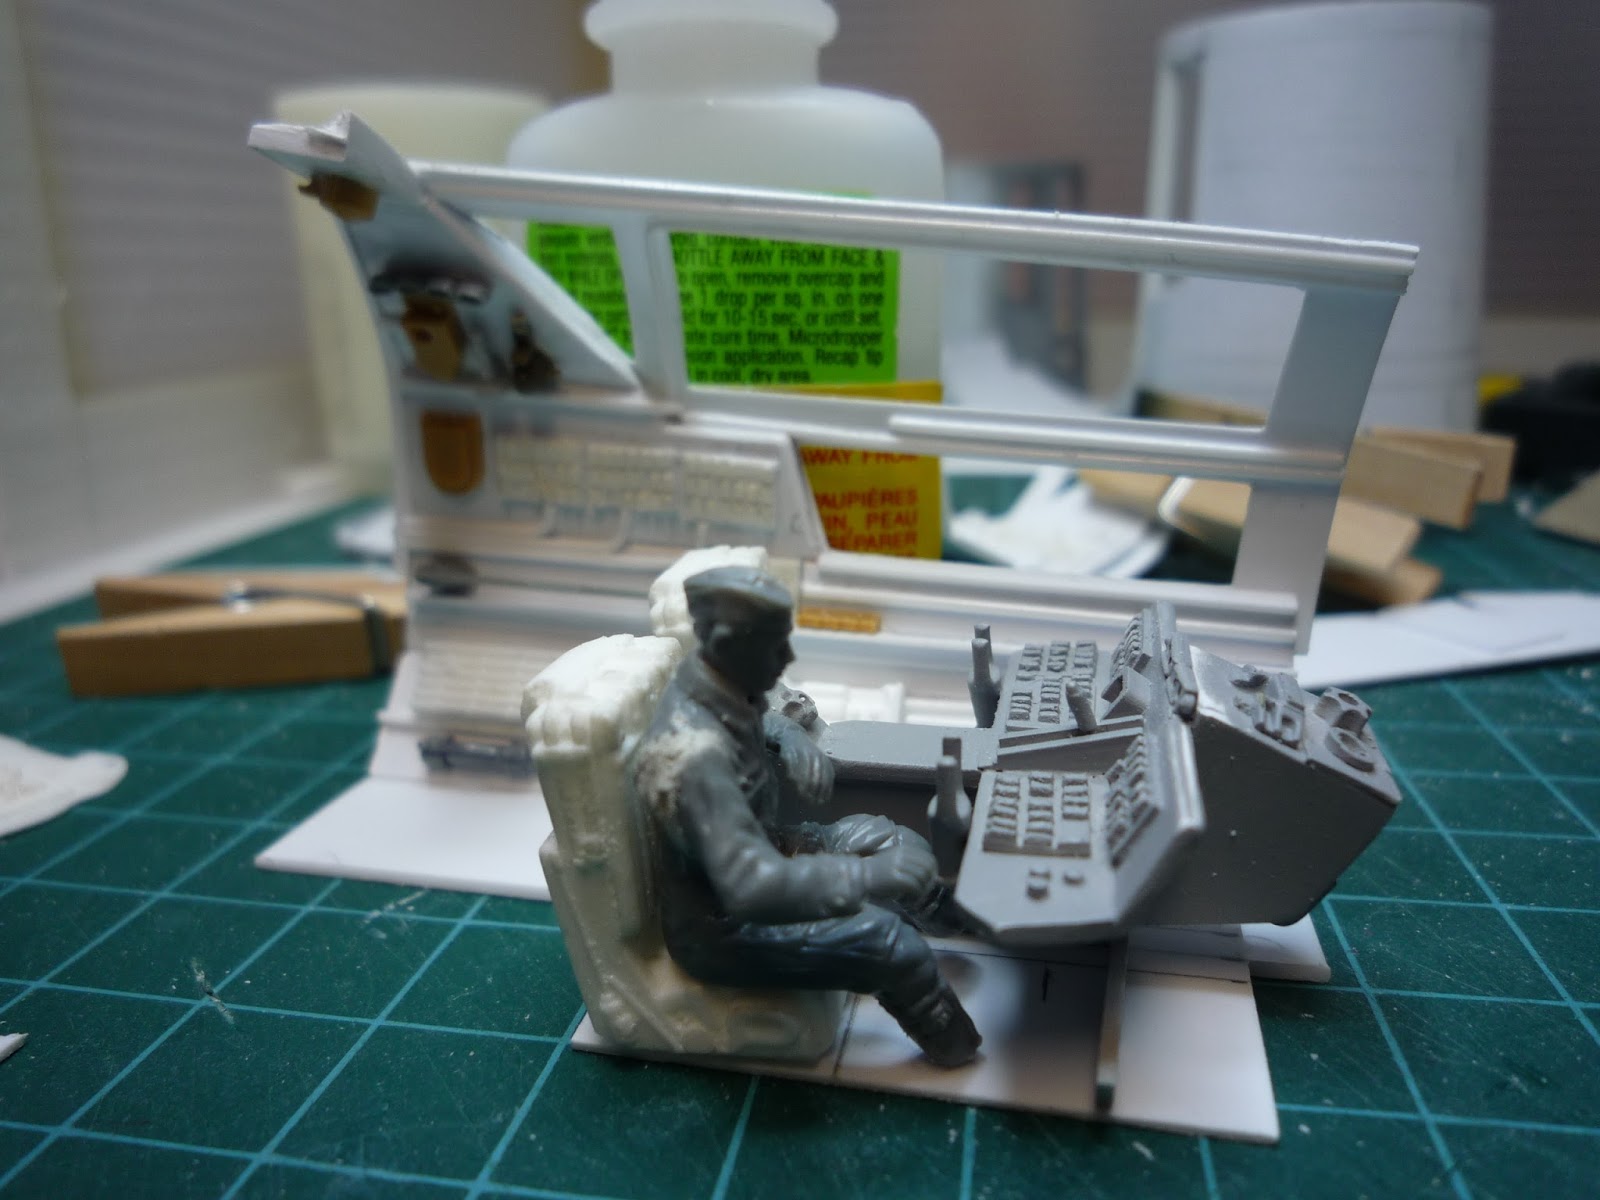
Putting the seats and console into place.
I've posted some pictures on the RPF and gotten some really nice comments.
I like this view, you'll never see it from this perspective. My idea here is the seats slide back on rails to allow the pilots to access their seats.
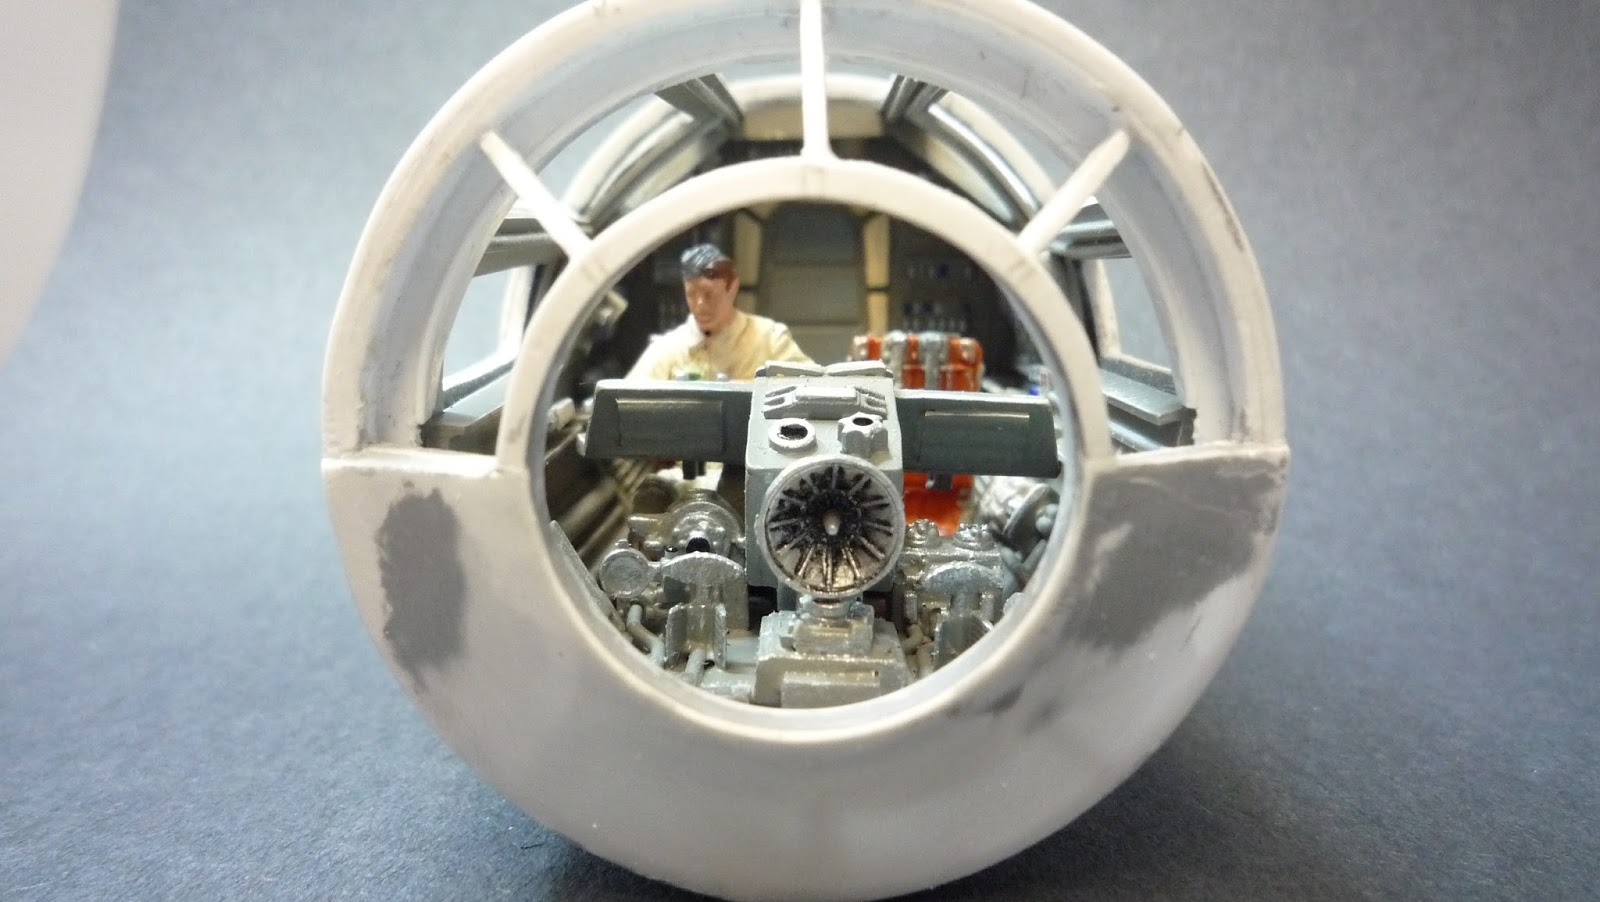
I hope you can appreciate how small the cockpit really is next to this shot glass.
My work recently bought a MakerBot 3D printer. So I've been learning to use it and some 3D programs including Tinkercad with which I created the back wall and door frame.
I added some extra greebles as the printer can only print so small. The texture is not great, but I don't mind it and you can't see it when it's all together.
The area in front of the console needed some extra detail so I built this array of greebles. I also needed to hide the co-pilots legs as you could see very clearly, through the front round window, that his legs were cut off below the knees to get him to fit.
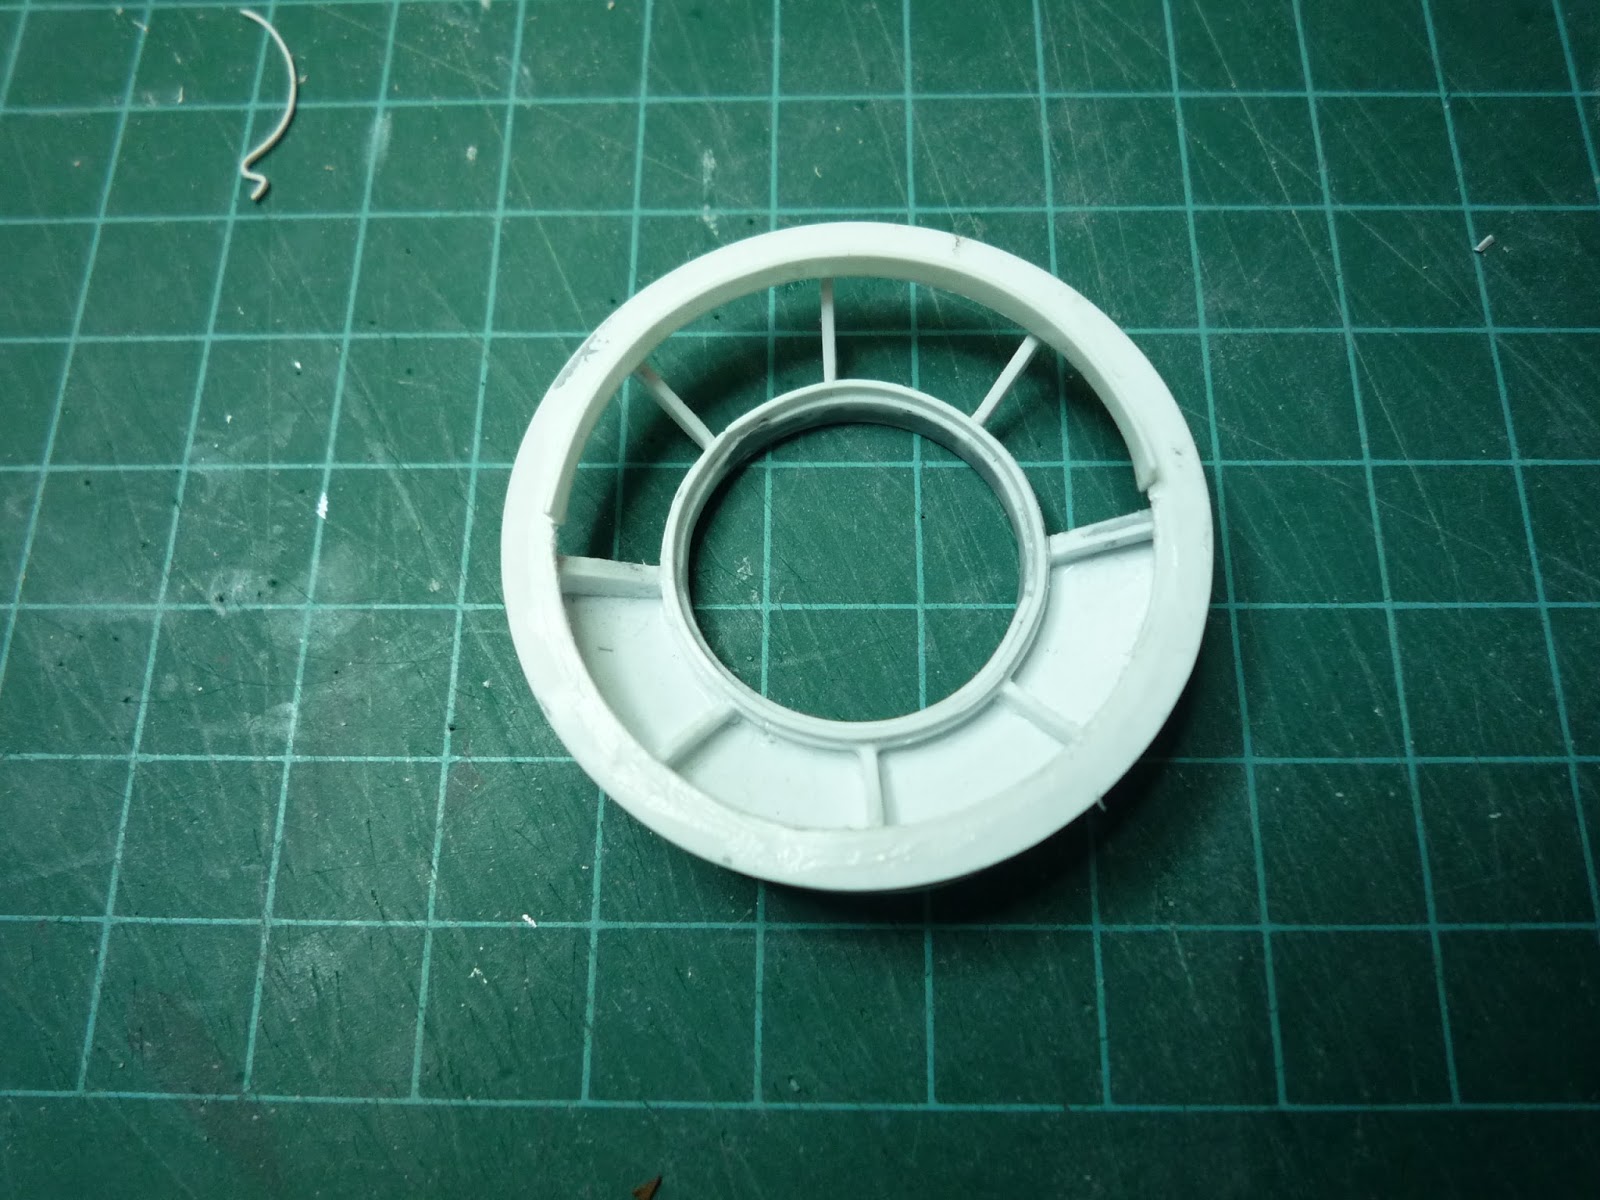
I had made a front window frame before, but accidentally destroyed it. So I made another, this time I used the 3D printer to make a jig to build the window frame onto. The rings were made by winding thin strips of styrene around some pipe and gluing them as I wound them, 3 layers was needed to help keep it's shape.
The lower half of the frame is covered with thin styrene. Since this shape is a cone it's a bit tricky.
Some modifications had to be done to help hide the leading edge of the internal frame.
The cockpit is almost done, I may add a few external parts and then it's ready for painting.